It was Friday afternoon and I just finished OpenShift Automation exam. I fail the exam last week because I couldn't figure out a couple of tasks, so I thought I should be able to finish the exam and then pass, since my score was close.
Except that I didn't pass. Same score, same tasks that I couldn't complete.
That evening, I thought about moving on to a different exam (since I used up the voucher for this exam, I will have to pay out of pocket). But I just couldn't let it go and after some thinking, I decided to change my approach to preparation for the OpenShift exam.
So that weekend, I went all in on OpenShift and rebuilt my home lab. This is the walkthrough of the setup, warts and all.
Why The Redo?
My current setup was primarily two clusters:
- An OKD (Openshift) setup that I somehow managed to install as a SNO and then expanded into a cluster of three. It is very much unstable, but I learned some important lesson that proven to the very helpful in my reboot.
- A OVirt Cluster (upstream version of Red Hat Virtualization). I had been using it extensively for my Red Hat Virtualization as well as my High Availability exam practices.
When I got access to Red Hat learning, I left both setups lie fallow while I used the Red Hat labs for practice. And that worked out well for a while.
However, while I liked Red Hat labs, there are two drawbacks to those environments:
- I only have a limited number of lab hours to work with.
- Working with the lab in a browse can be annoying.
- They tend to be slow to start up (especially with OpenShift)
That mean that I didn’t practice much as I should with OpenShift, so I ended up having to repeat my last couple of OpenShift exams, and in the case of EX380 (OpenShift exam), repeat and still not pass.
(To be clear, I still think that Red Hat Learning is worth it. A for what it is worth, as of this time, I got two months left on my subscription and I still have 200 hours left to play with. So I was too conservative with my usage)
Given all that, I looked at my setup and decided to rebuild my home lab and fully commit to OpenShift.
Preparation
OpenShift/OKD deployment is complex, to put it mildly. The installation process is wrapped around a boot process that involves multiple reboots and configurations. This is necessary because OpenShift is a platform on top of Kubernetes, which involves deploying a dedicated OS and multiple components that are not necessarily included as part of a baseline Kubernetes. You will get a powerful cluster when you are done, but there will be pain if you some key steps. Therefore, you will need to do a lot of planning if you were to have a successful OpenShift installation.
(As an aside, from this point on, we will refer to OpenShift/OKD or OKD as OpenShift since OKD is the upstream of OpenShift)
For hardware, this is what I have on inventory:
Hardware    CPU Memory  Disk
Asus Mini PC    AMD 64 GiB  2 TiB M.2 Drive
Intel NUC   Intel   32 GiB  512 GiB M.2 Drive
Intel NUC   Intel   32 GiB  256 GiB M.2 Drive
Intel NUC   Intel   32 GiB  256 GiB M.2 Drive
Intel NUC   Intel   32 GiB  256 GiB M.2 Drive
Intel NUC   Intel   32 GiB  256 GiB M.2 Drive
For networking, I got a US-8 Ubiquiti Switch to connect my nodes:

And a NetGate appliance that I will use for DNS and load balancing:
With the hardware at hand, I start to map out my IP addresses and mapped hostnames, from which. I will use these for my baseline forward and reverse DNS.
(Not showed here, but I also mapped the hostname names and IP addresses to hardware addresses of each box, which lets me assign the IPs to those machines via DHCP).
Networking
Now I map out my IPs that I will assign to each of my nodes. In turn, those node and IP I will use for my forward and reverse DNS. It looks like this:
+-----------------------------+--------------+
|            Node             |  IP Address  |
+-----------------------------+--------------+
| control00.node.example.com  | 172.16.1.210 |
| control01.node.example.com  | 172.16.1.211 |
| control02.node.example.com  | 172.16.1.212 |
| worker00.node.example.com   | 172.16.1.220 |
| worker01.node.example.com   | 172.16.1.221 |
| worker02.node.example.com   | 172.16.1.222 |
+-----------------------------+--------------+
1) Disclosure: These are not the IPs I assigned in my real cluster, but out of the abundance of caution, I rather not provide my real IPs, even if they are private IPs. :D
2) The reverse DNS is particularly critical in the installation. If reverse DNS is not setup, the installation will take a long time or very likely will fail.
3) You need to make sure that you have entries defined for your endpoint as well as your wildcards This lets you deploy your apps under the domain you assign with a fully resolvable URL. In my case, it looks like this:
+----------------------+------------+
|        Record        | IP Address |
+----------------------+------------+
| apps.example.com     | 172.16.1.5 |
| *.app.example.com    | 172.16.1.5 |
| api.example.com      | 172.16.1.5 |
| api-int.example.com  | 172.16.1.5 |
+----------------------+------------+
If you notice, you will also see that most of the IPs I assigned are on the same subnet. That is required - otherwise, the installation will not proceed.
With all that said and done, I created my forward DNS records in BIND:
$TTL 300
;
$ORIGIN example.com.

;   Database file example.com.DB for example.com zone.
;   Do not edit this file!!!
;   Zone version 2757946178
;
example.com.     IN  SOA 127.0.0.1.      my.localhost. (
        2757946178 ; serial
        1d ; refresh
        2h ; retry
        4w ; expire
        1h ; default_ttl
        )

;
; Zone Records
;
@    IN NS  127.0.0.1.
@    IN A   172.16.1.5
ns1      IN A   172.16.1.5
control00.node   IN A   172.16.1.210
control01.node   IN A   172.16.1.211
control02.node   IN A   172.16.1.212
worker00.node    IN A   172.16.1.220
worker01.node    IN A   172.16.1.221
worker02.node    IN A   172.16.1.222
apps.okd     IN A   172.16.1.5
*.apps.okd   IN A   172.16.1.5
api.okd      IN A   172.16.1.5
api-int      IN A   172.16.1.5
As well as my reverse DNS records:
$TTL 84600
;
$ORIGIN 1.16.172.in-addr.arpa.

;   Database file 1.16.172.DB for 1.16.172 zone.
;   Do not edit this file!!!
;   Zone version 2757967879
;
@    IN  SOA 127.0.0.1.      my.email.com. (
        2757967879 ; serial
        1d ; refresh
        2h ; retry
        4w ; expire
        1h ; default_ttl
        )

;
; Zone Records
;
     IN NS  127.0.0.1.
210      IN PTR     control00.node.example.com.
211      IN PTR     control01.node.example.com.
212      IN PTR     control02.node.example.com.
220      IN PTR     worker00.node.example.com.
221      IN PTR     worker01.node.example.com.
222      IN PTR     worker02.node.example.com.
And then I setup my load balancer configuration. As I am using haproxy for load balancing, I put in a front end for each service:
 +------+--------------+
| Port |      LB      |
+------+--------------+
| 6443 | lb01 (api)   |
|   80 | lb02 (http)  |
|  443 | lb03 (https) |
+------+--------------+
It ended up looking like this:
# cat haproxy.cfg
# Automaticaly generated, dont edit manually.
# Generated on: 2025-09-17 02:06
global
    maxconn         10000
    stats socket /tmp/haproxy.socket level admin  expose-fd listeners
    uid         80
    gid         80
    nbthread            1
    hard-stop-after     15m
    chroot              /tmp/haproxy_chroot
    daemon
    server-state-file /tmp/haproxy_server_state

listen HAProxyLocalStats
    bind 127.0.0.1:2200 name localstats
    mode http
    stats enable
    stats admin if TRUE
    stats show-legends
    stats uri /haproxy/haproxy_stats.php?haproxystats=1
    timeout client 5000
    timeout connect 5000
    timeout server 5000

frontend lb01.example.com
    bind            172.16.1.5:6443 name 172.16.1.5:6443
    mode            tcp
    log         global
    timeout client      30000
    default_backend okd-api_ipvANY

frontend lb02.example.com
    bind            172.16.1.5:80 name 172.16.1.5:80
    mode            tcp
    log         global
    timeout client      30000
    default_backend okd-http_ipvANY

frontend lb03.example.com
    bind            172.16.1.5:443 name 172.16.1.5:443
    mode            tcp
    log         global
    timeout client      30000
    default_backend okd-https_ipvANY

backend okd-api_ipvANY
    mode            tcp
    id          100
    log         global
    timeout connect     30000
    timeout server      30000
    retries         3
    load-server-state-from-file global
    server          control00 172.16.1.210:6443 id 101 check inter 1000
    server          control01 172.16.1.211:6443 id 103 check inter 1000
    server          control02 172.16.1.212:6443 id 113 check inter 1000
    server          worker00 172.16.1.220:6443 id 102 check inter 1000
    server          worker01 172.16.1.221:6443 id 106 check inter 1000
    server          worker02 172.16.1.222:6443 id 118 check inter 1000

backend okd-http_ipvANY
    mode            tcp
    id          104
    log         global
    timeout connect     30000
    timeout server      30000
    retries         3
    load-server-state-from-file global
    server          control00 172.16.1.210:80 id 105 check inter 1000
    server          control01 172.16.1.211:80 id 107 check inter 1000
    server          control02 172.16.1.212:80 id 115 check inter 1000
    server          worker00 172.16.1.220:80 id 110 check inter 1000
    server          worker01 172.16.1.221:80 id 112 check inter 1000
    server          worker02 172.16.1.222:80 id 119 check inter 1000

backend okd-https_ipvANY
    mode            tcp
    id          108
    log         global
    timeout connect     30000
    timeout server      30000
    retries         3
    load-server-state-from-file global
    server          control00 172.16.1.210:443 id 109 check inter 1000
    server          control01 172.16.1.211:443 id 111 check inter 1000
    server          control02 172.16.1.212:443 id 117 check inter 1000
    server          worker00 172.16.1.220:443 id 114 check inter 1000
    server          worker01 172.16.1.221:443 id 116 check inter 1000
    server          worker02 172.16.1.222:443 id 120 check inter 1000
With that all done, I can proceed with the Installation
Installation
For deploying the cluster, I choose to self-host an Assisted Service install on my personal machine (it doesn't need to be on the same network subnet as cluster) . This requires me to run Podman and run this manifest, composing of a configmap and a pod
For the ConfigMap, I need to change all the IPs to my machine (where I will host the installer. Then, I updated the OS_IMAGE by picking the correct live image from CentOS SCOS. You can find them right here. Then I updated the fields to:
- openshift_version:
4.19 - url: https://cloud.centos.org/centos/scos/9/prod/streams/9.0.20250510-0/x86_64/scos-9.0.20250510-0-live-iso.x86_64.iso
- version:
9.0.20250510-0
Finally, I update RELEASE_IMAGES with most recent version of OpenShift/OKD 4.19 build (at the time) using the info here. The fields I updated were:
- openshift_version:
4.19 - url:
registry.ci.openshift.org/origin/release-scos:scos-4.19 - version:
4.19.0
The resulting manifest look like this:
apiVersion: v1
kind: ConfigMap
metadata:
  name: config
data:
  ASSISTED_SERVICE_HOST: 172.16.2.158:8090
  ASSISTED_SERVICE_SCHEME: http
  AUTH_TYPE: none
  DB_HOST: 127.0.0.1
  DB_NAME: installer
  DB_PASS: admin
  DB_PORT: "5432"
  DB_USER: admin
  DEPLOY_TARGET: onprem
  DISK_ENCRYPTION_SUPPORT: "false"
  DUMMY_IGNITION: "false"
  ENABLE_SINGLE_NODE_DNSMASQ: "false"
  HW_VALIDATOR_REQUIREMENTS: '[{"version":"default","master":{"cpu_cores":4,"ram_mib":16384,"disk_size_gb":100,"installation_disk_speed_threshold_ms":10,"network_latency_threshold_ms":100,"packet_loss_percentage":0},"arbiter":{"cpu_cores":2,"ram_mib":8192,"disk_size_gb":100,"installation_disk_speed_threshold_ms":10,"network_latency_threshold_ms":1000,"packet_loss_percentage":0},"worker":{"cpu_cores":2,"ram_mib":8192,"disk_size_gb":100,"installation_disk_speed_threshold_ms":10,"network_latency_threshold_ms":1000,"packet_loss_percentage":10},"sno":{"cpu_cores":8,"ram_mib":16384,"disk_size_gb":100,"installation_disk_speed_threshold_ms":10},"edge-worker":{"cpu_cores":2,"ram_mib":8192,"disk_size_gb":15,"installation_disk_speed_threshold_ms":10}}]'
  IMAGE_SERVICE_BASE_URL: http://172.16.2.158:8888
  IPV6_SUPPORT: "true"
  ISO_IMAGE_TYPE: "full-iso"
  LISTEN_PORT: "8888"
  NTP_DEFAULT_SERVER: ""
  POSTGRESQL_DATABASE: installer
  POSTGRESQL_PASSWORD: admin
  POSTGRESQL_USER: admin
  PUBLIC_CONTAINER_REGISTRIES: 'quay.io,registry.ci.openshift.org'
  SERVICE_BASE_URL: http://172.16.2.158:8090
  STORAGE: filesystem
  OS_IMAGES: '[{"openshift_version":"4.19","cpu_architecture":"x86_64","url":"https://cloud.centos.org/centos/scos/9/prod/streams/9.0.20250510-0/x86_64/scos-9.0.20250510-0-live-iso.x86_64.iso","version":"9.0.20250510-0"}]'
  RELEASE_IMAGES: '[{"openshift_version":"4.19","cpu_architecture":"x86_64","cpu_architectures":["x86_64"],"url":"registry.ci.openshift.org/origin/release-scos:scos-4.19","version":"4.19.0","default":true,"support_level":"beta"}]'
  ENABLE_UPGRADE_AGENT: "false"
  ENABLE_OKD_SUPPORT: "true"
---
apiVersion: v1
kind: Pod
metadata:
  labels:
    app: assisted-installer
  name: assisted-installer
spec:
  containers:
  - args:
    - run-postgresql
    image: quay.io/sclorg/postgresql-12-c8s:latest
    name: db
    envFrom:
    - configMapRef:
        name: config
    volumeMounts:
      - mountPath: /var/lib/pgsql
        name: pg-data
  - image: quay.io/edge-infrastructure/assisted-installer-ui:latest
    name: ui
    ports:
    - hostPort: 8080
    envFrom:
    - configMapRef:
        name: config
  - image: quay.io/edge-infrastructure/assisted-image-service:latest
    name: image-service
    ports:
    - hostPort: 8888
    envFrom:
    - configMapRef:
        name: config
  - image: quay.io/edge-infrastructure/assisted-service:latest
    name: service
    ports:
    - hostPort: 8090
    envFrom:
    - configMapRef:
        name: config
    volumeMounts:
      - mountPath: /data
        name: ai-data
  restartPolicy: Never
  volumes:
    - name: ai-data
      persistentVolumeClaim:
        claimName: ai-service-data
    - name: pg-data
      persistentVolumeClaim:
        claimName: ai-db-data
I spin up the pod on my workstation:
podman play kube assisted-installer.yaml
Once it was ready, I launched my web browser and access my workstation IP on port 80, which gives me this:

I went and created the cluster and populated my cluster name as well as my base domain:
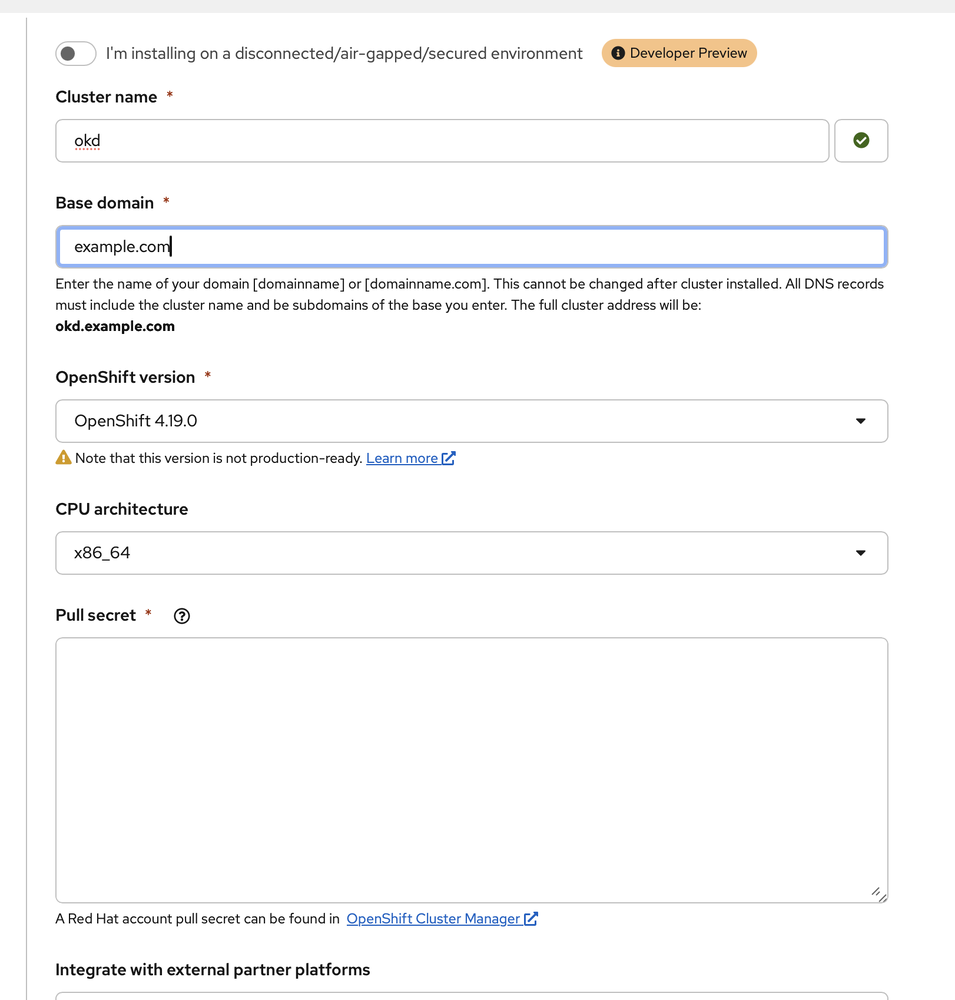
IMPORTANT: For your pull secret, do not use your Red Hat pull secret if you have that on hand. Instead, for OKD, use the sample one here:
{"auths":{"fake":{"auth":"aWQ6cGFzcwo="}}}
Otherwise, you will violate your agreement with Red Hat.
I left the number of control plane nodes to three:
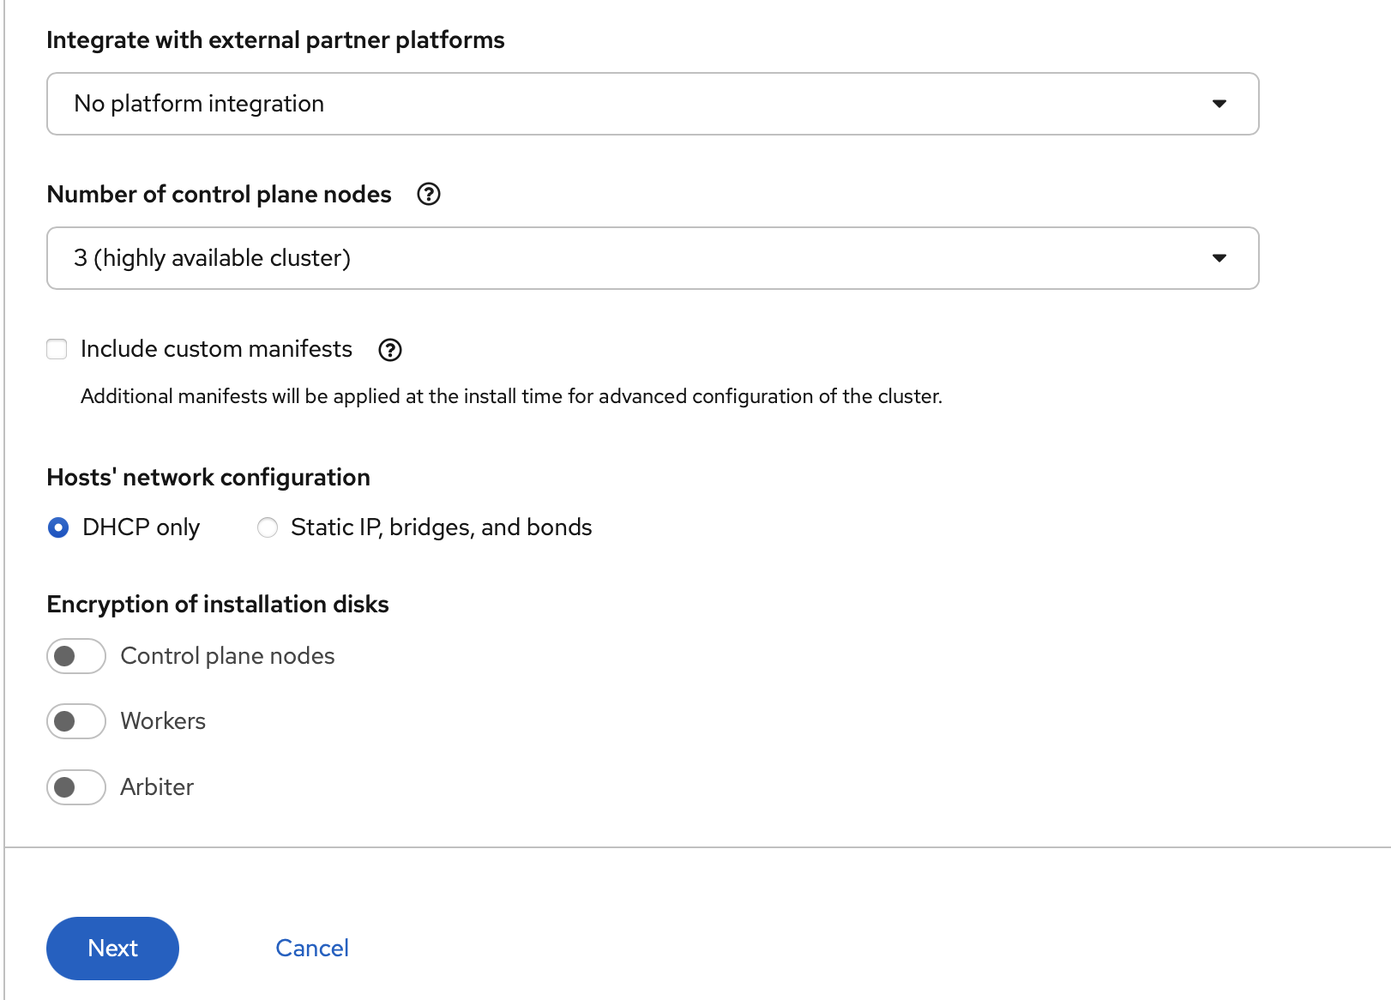
I clicked next on this screen (I can always install them later)
Now I am ready to add the hosts, which requires me to generate a discovery ISO and boot off it. So I click on add host (top left):
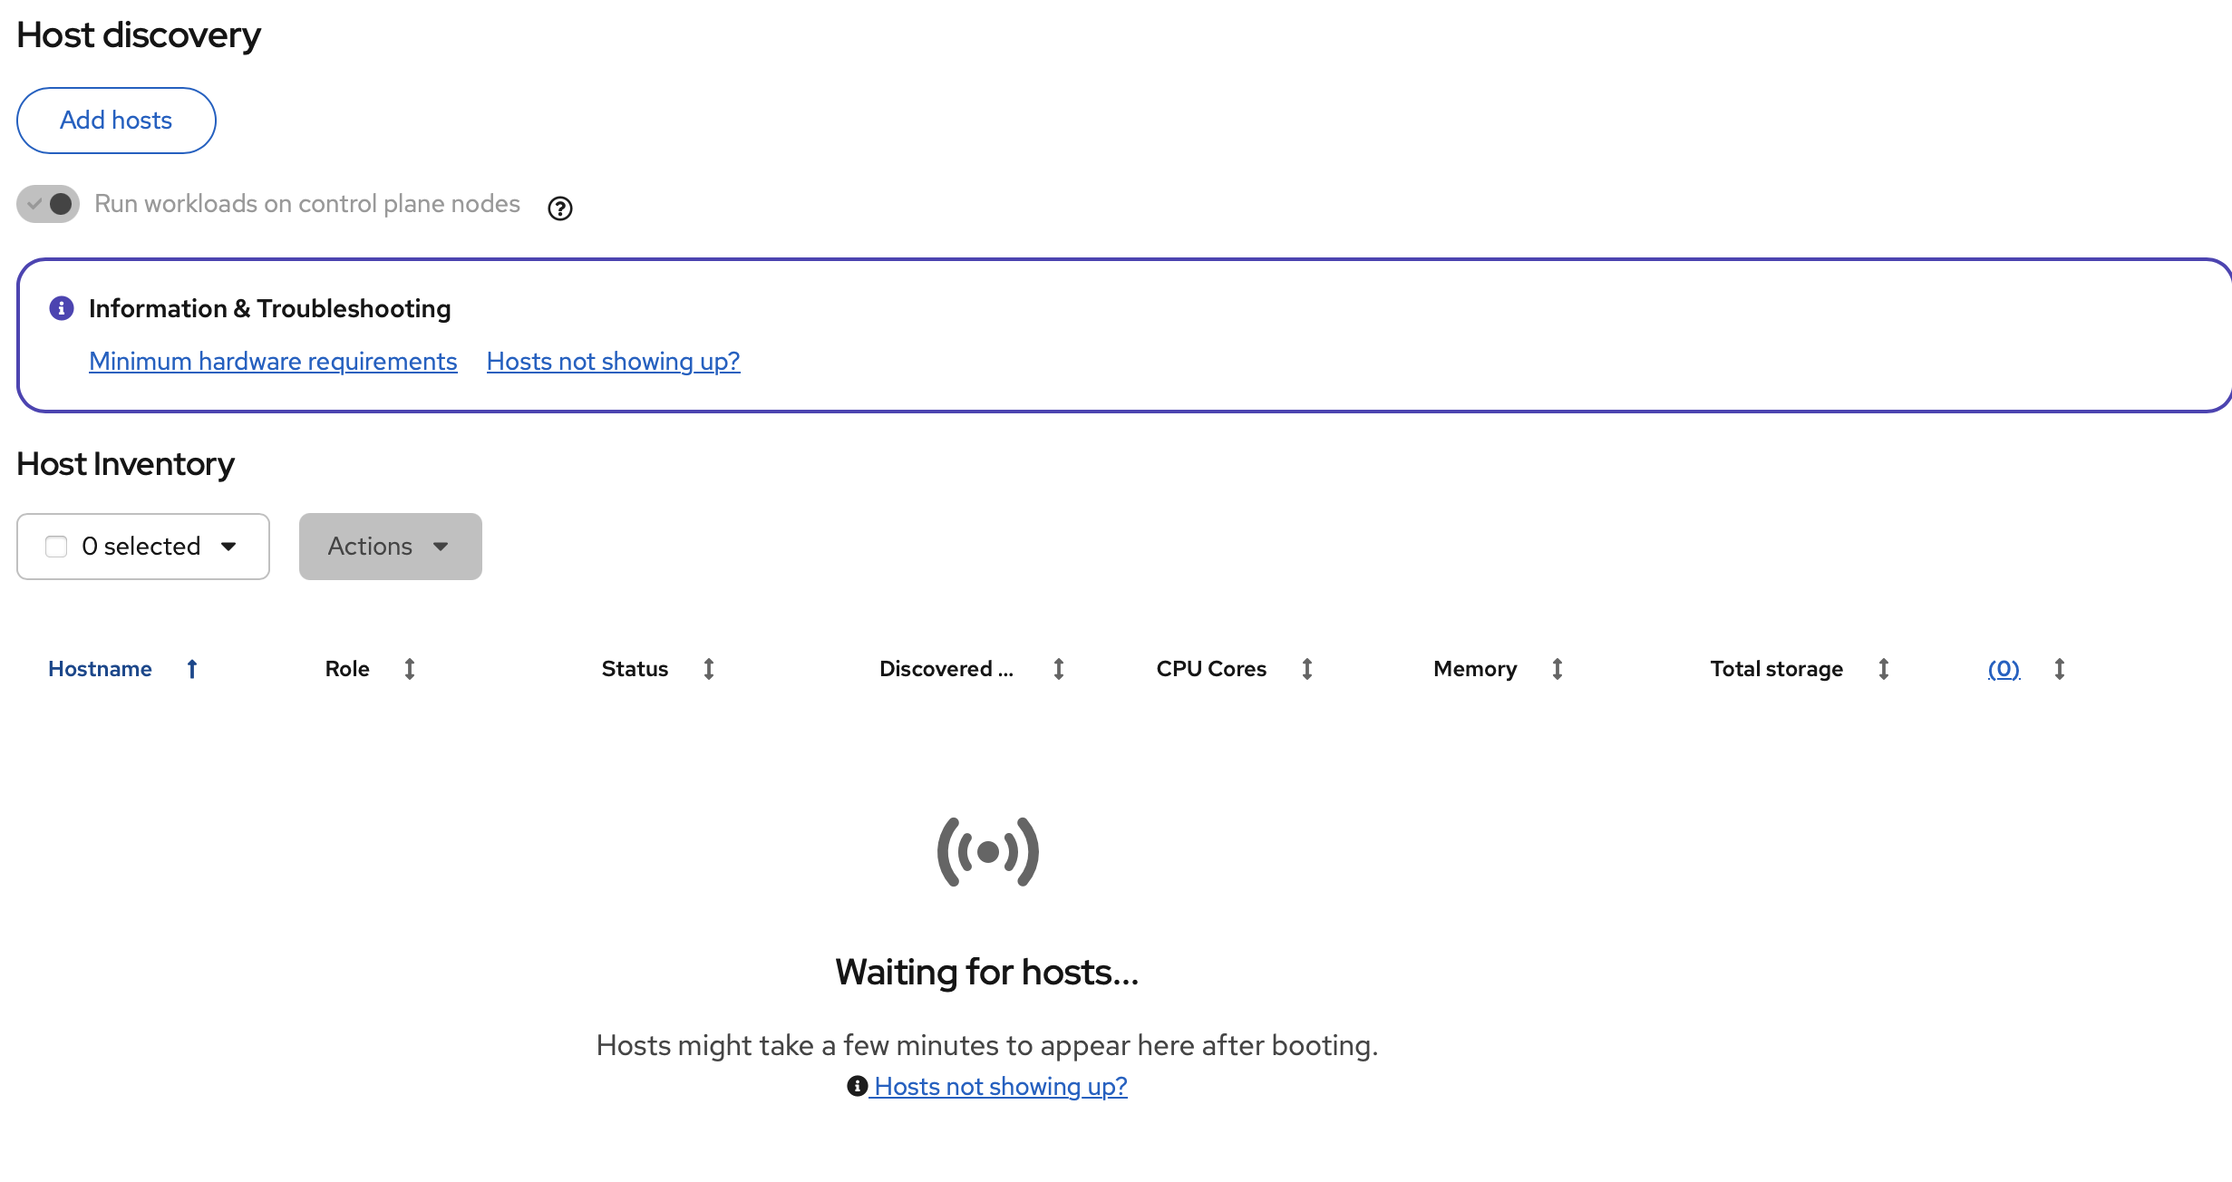
Select the minimal ISO and populate SSH key with my own. Then I generate and download the ISO:

Now, if I have real server hardware, I could simply insert the ISO into the machine, but since these are desktop machines, I had to burn into each USB disk, plug them in, and then boot them up:
It was a mild mess.
As I boot each machine, they start to show up in the Host inventory, with each machine booted with the hostname I assign to them via DHCP. As they start up, I ether assign them the control plane role or worker role:
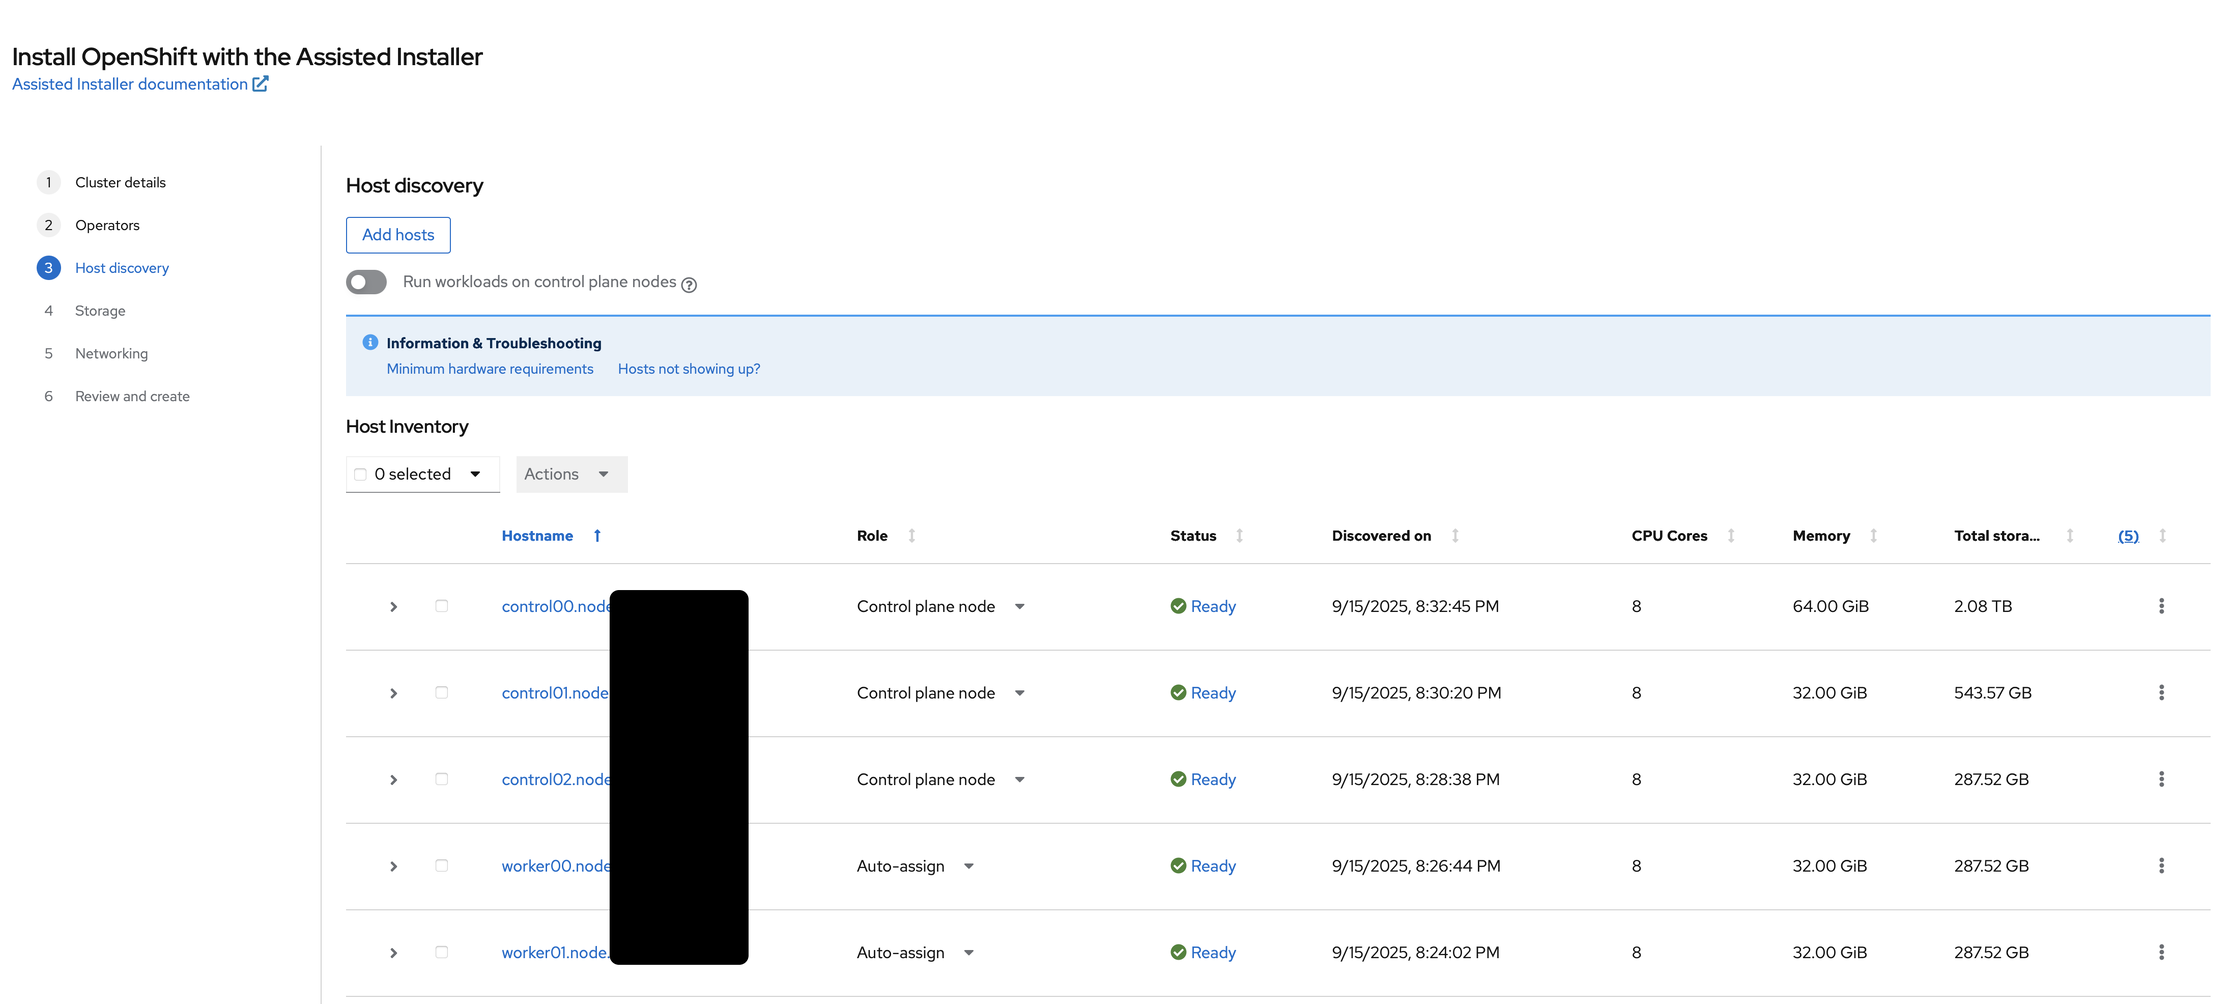
(As an aside I had issues with getting worker02 at the time, hence it missing from the installation. I end up have to redo the installation)
Once that is done, I went to storage and I generally proceed without any changes:
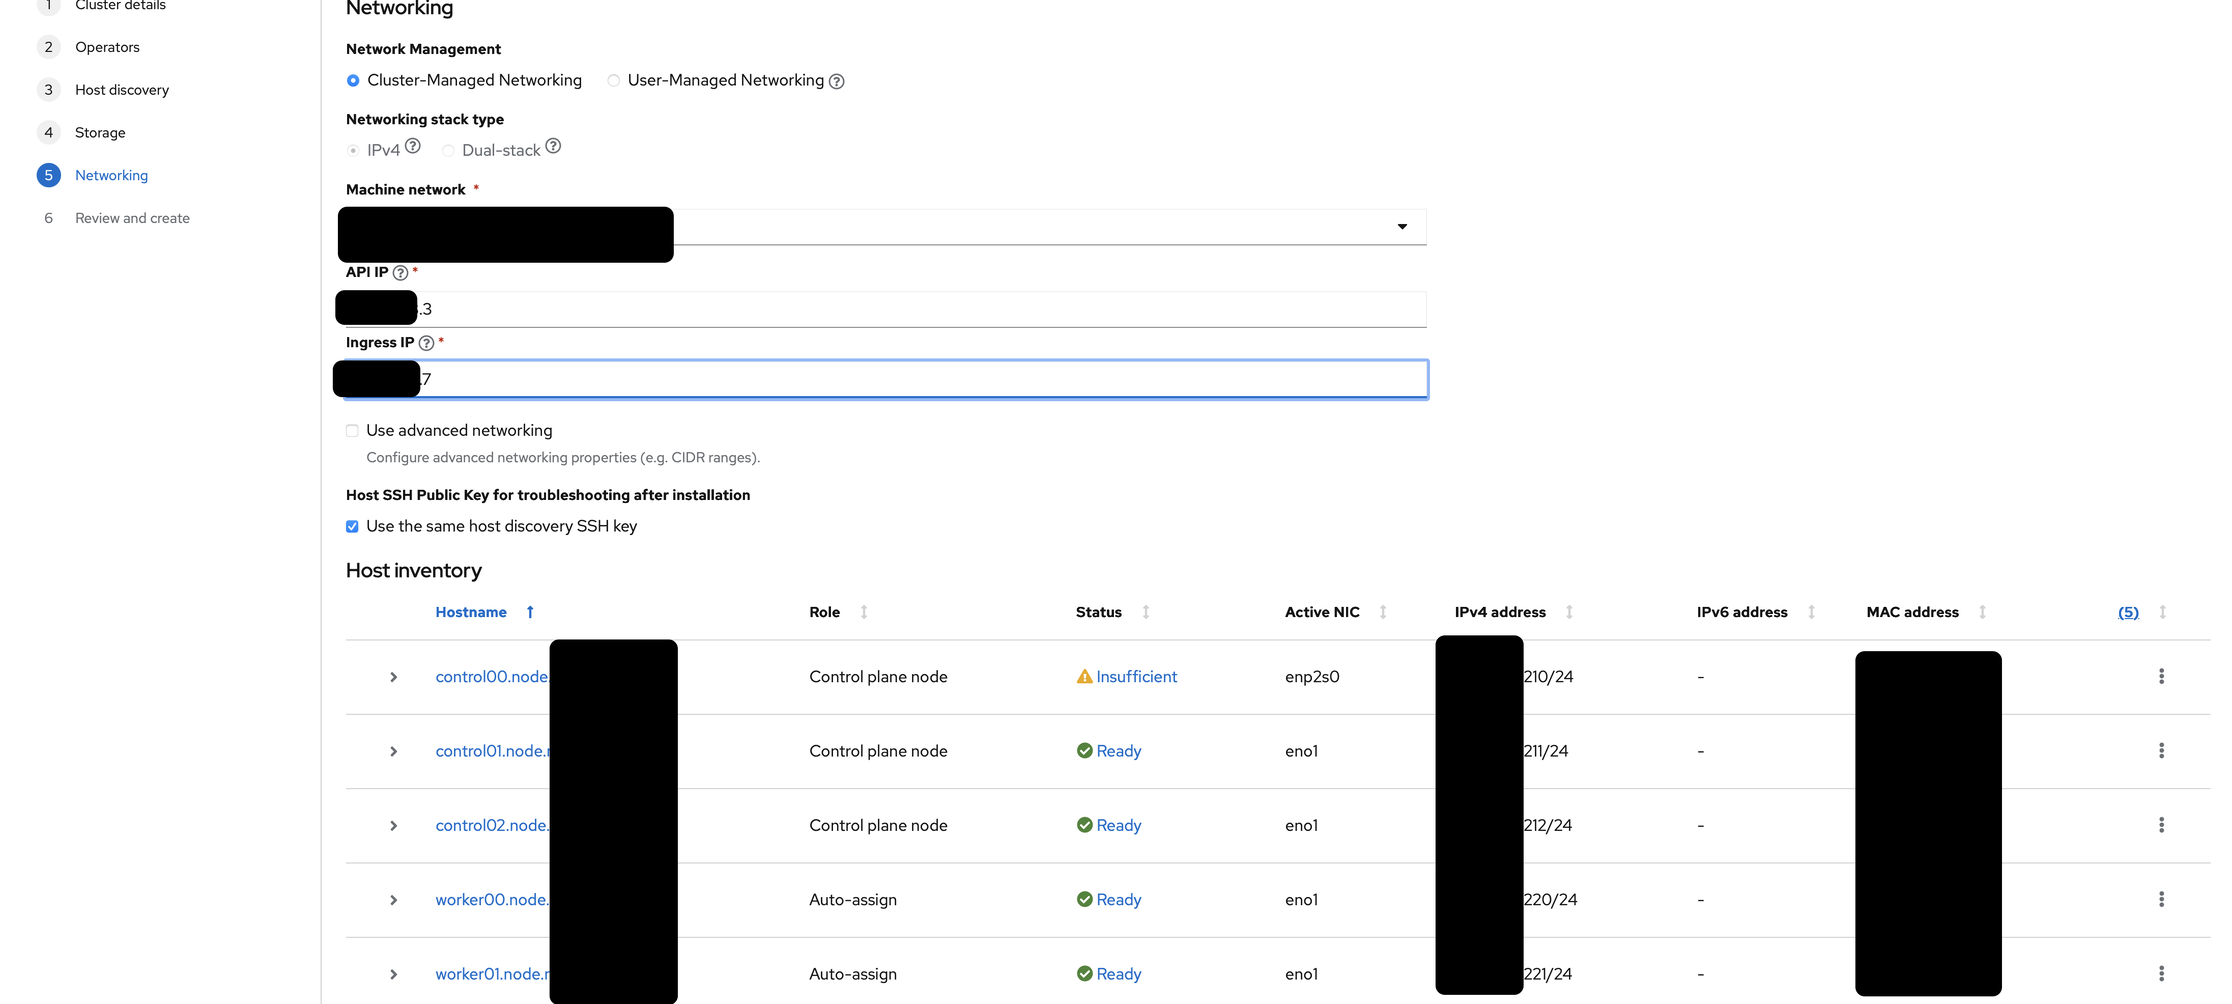
Finally, I am prompted to select the type of network management and stack type (l left those alone) as well as a floating API and Ingress IP. I just pick closest available IPs to my load balancer (within the same network):
Then I went and kick off the install after the last screen, which took about 30 minutes.
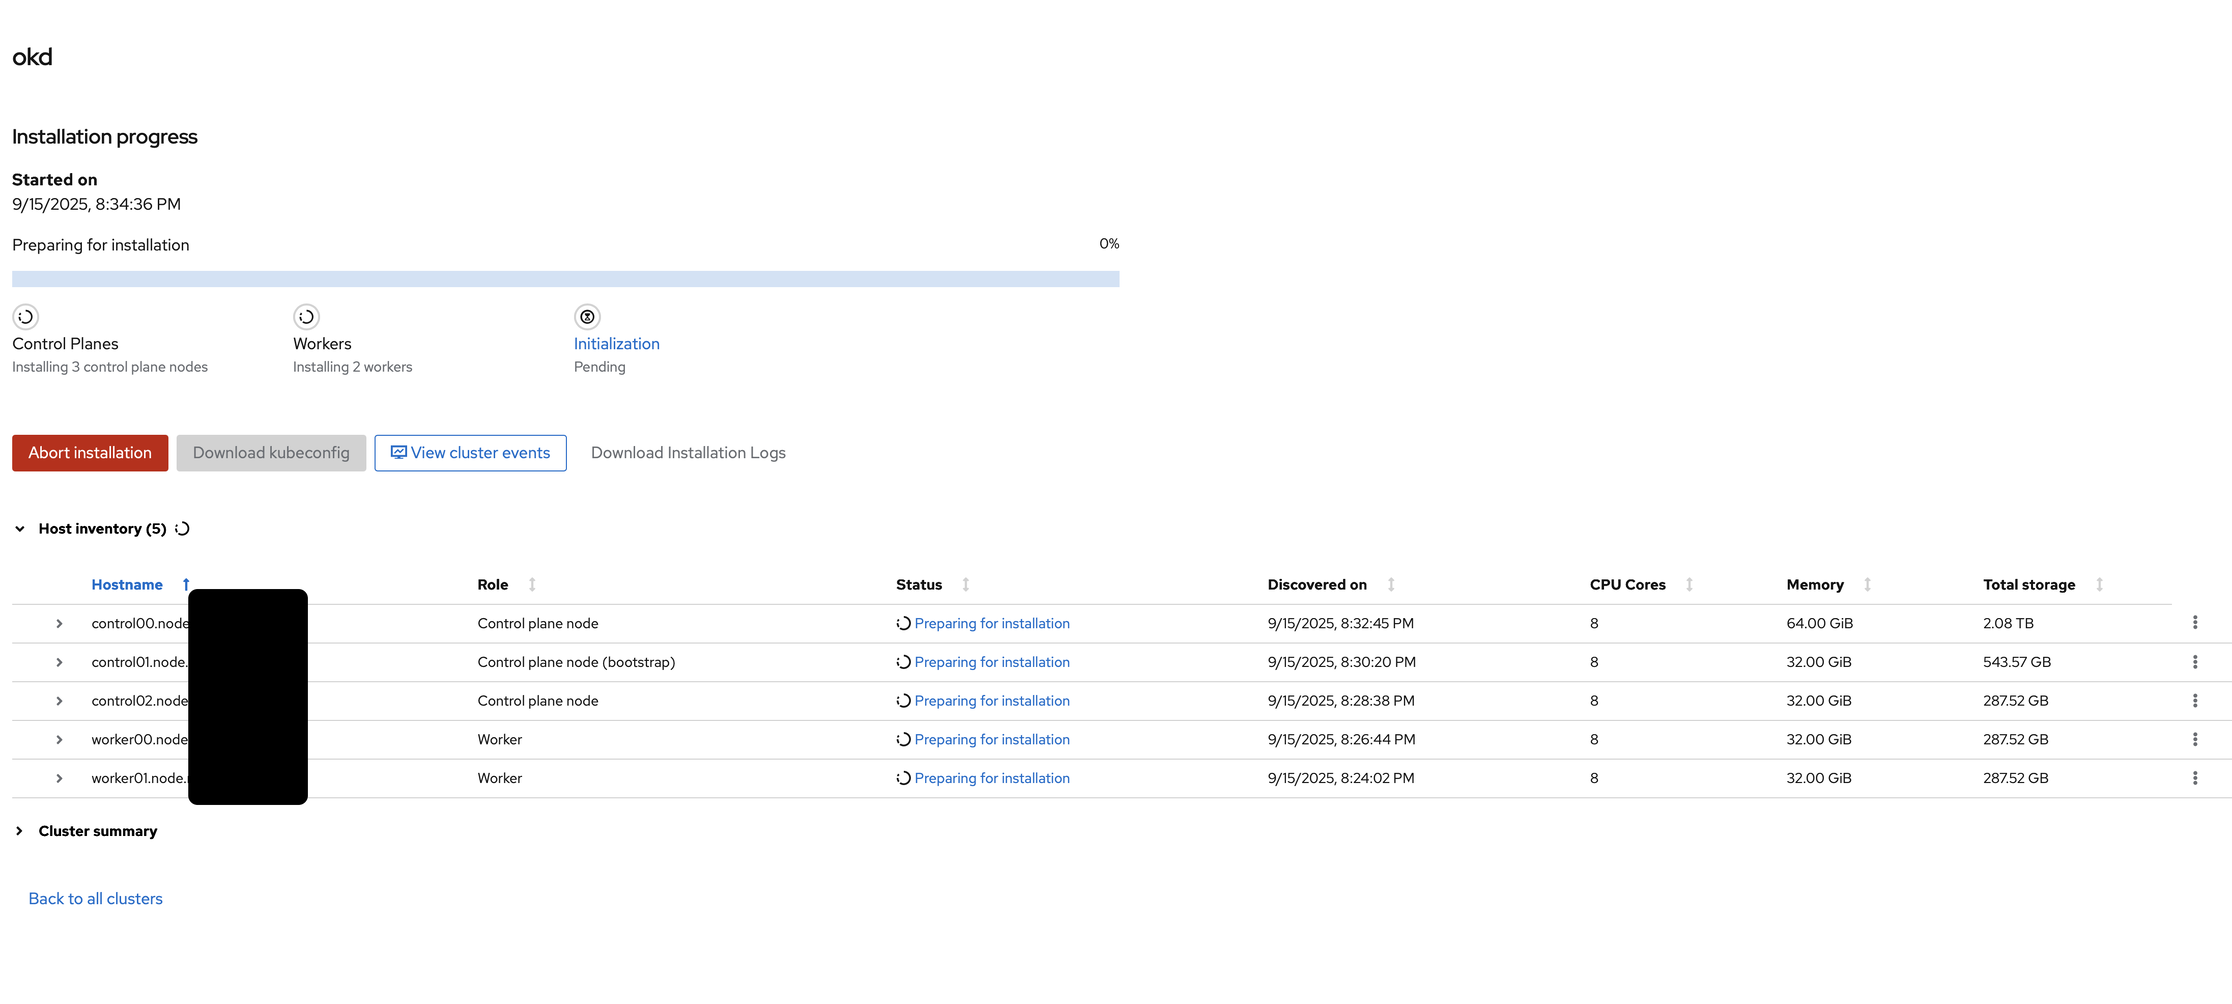
Meanwhile, as it was installing, the installation created a kubeconfig file, which I quickly downloaded.
Once the installer is complete, I went and tried to get the default password into the clipboard, but it doesn’t work, no matter which browser I tried. Fortunately, I still have the kubeconfig I downloaded, so I used to authenticate against the cluster, at least temporarily:
oc get pods --kubeconfig kubeconfig-noingress
Final Configuration
Once I can confirmed that I can login, I setup an HTPasswd provider, which allows me to connect with my own secrets. Involves creating a htpasswd file with my username:
htpasswd -c -B htpasswd rilindo
Then store that htpasswd file into a secret:
oc create secret generic htpass-secret --from-file=htpasswd -n openshift-config
Once that is done, I add the HTPasswd identity provider:
apiVersion: config.openshift.io/v1
kind: OAuth
metadata:
  name: cluster
spec:
  identityProviders:
  - name: htpasswd_provider
    challenge: true
    login: true
    mappingMethod: claim
    type: HTPasswd
    htpasswd:
      fileData:
        name: htpass-secret
The identity provider lets me authenticate against the htpasswd stored in the secret.
Once the identity provider is created, OpenShift starts redeploying the pods that handles authentication. While that is happening in the background, I created a group for OpenShift cluster administrators:
oc adm groups create okd_admins --kubeconfig kubeconfig-noingress
And then added the cluster admin permissions to the group:
oc adm policy add-cluster-role-to-group cluster-admin okd_admins --kubeconfig kubeconfig-noingress
Finally, I added my user to the group:
oc adm groups add-users okd_admins rilindo --kubeconfig kubeconfig-noingress
At this point, I am able to login (the redeployment should be complete) via:
➜  oc login -u rilindo https://api.okd.example.com:6443
Console URL: https://api.okd.example.com:6443/console
Authentication required for https://api.okd.example.com:6443 (openshift)
Username: rilindo
Password:
Login successful.

You have access to 87 projects, the list has been suppressed. You can list all projects with 'oc projects'
As well as via the web console:


My Openshift cluster is now ready.
Epilogue
With the cluster, I spent more time practicing on the tasks I couldn’t complete during and finally figured out the gaps I had. On October 7th, I re-took the EX380 - and passed.
I hope this walkthrough helps somebody else setup their own bare metal Openshift/OKD cluster. I am more than happy to get some feedback on this, so let me know how useful this is for you!